一、struts普通直接传值
struts2的直接传值方式是在action类中声明每个属性,并为其添加get和set方法,则这些属性就可以自动的封装到struts2中,等待调用。
下面举个例子:
1.我们先创建一个web项目,为其添加strtus2所需的jar包(如果不太清楚可以模仿我的以前一篇文章链接)。
2.在项目的src下创建packag:indi.zx.j2eetest,然后在里面创建类UserAction。如图:
然后添加如下代码:1
2
3
4
5
6
7
8
9
10
11
12
13
14
15
16
17
18
19
20
21
22
23
24
25
26
27
28
29
30
31
32
33
34
35
36
37
38
39
40
41
42
43
44
45
46
47
48/**
* @author XiaoHuZiXianShengZx
* 直接参数传递
*
*/
@SuppressWarnings("serial")
public class UserAction extends ActionSupport {
private String name;
private int age;
private String email;
private String phone;
//重载ActionSupport中的execute方法
public String execute(){
System.out.println("name="+name);
System.out.println("age="+age);
System.out.println("email="+email);
System.out.println("phone="+phone);
return "success";
}
//添加get和set方法,用于参数传递
public String getName() {
return name;
}
public void setName(String name) {
this.name = name;
}
public int getAge() {
return age;
}
public void setAge(int age) {
this.age = age;
}
public String getEmail() {
return email;
}
public void setEmail(String email) {
this.email = email;
}
public String getPhone() {
return phone;
}
public void setPhone(String phone) {
this.phone = phone;
}
}
注:一般情况下我们都继承ActionSupport类,重写其execute()方法。
3.配置struts.xml1
2
3
4
5
6
7<struts>
<package name="mypackage" extends="struts-default">
<action name="regist" class="indi.zx.j2eetest.UserAction">
<result>ok.jsp</result>
</action>
</package>
</struts>
4.编写index.jsp和ok.jsp
index.jsp1
2
3
4
5
6
7
8
9
10
11<body>
<div style="border: solid 1px black;width: 300px;height: 200px;margin: 0 auto">
<form action="regist.action" method="post">
用户名 :<input type="text" name="name" /><br/>
年 龄:<input type="text" name="age" /><br/>
Email :<input type="text" name="email" /><br/>
手机号码:<input type="text" name="phone" /><br/>
<input type="submit" value="提交"/>
</form>
</div>
</body>
ok.jsp1
2
3
4
5
6
7
8
9引入标签:<%@ taglib prefix="s" uri="/struts-tags" %>
<body>
恭喜用户:<s:property value="name" />,登陆成功!你的信息如下:<br>
姓名:<s:property value="name" /> <br>
年龄:<s:property value="age" /> <br>
邮箱:<s:property value="email" /> <br>
手机号码:<s:property value="phone" /><br>
</body>
5.这里我们还不用编写web.xml用默认生成的就好了(如有生成疑问去上面的链接看看)。
6.运行结果:
初始界面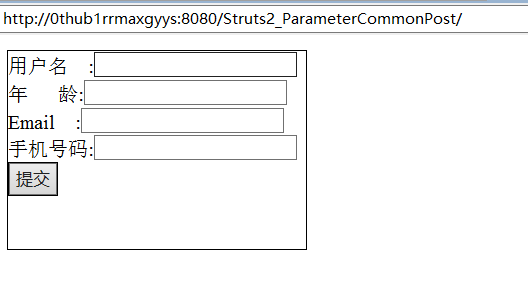
输入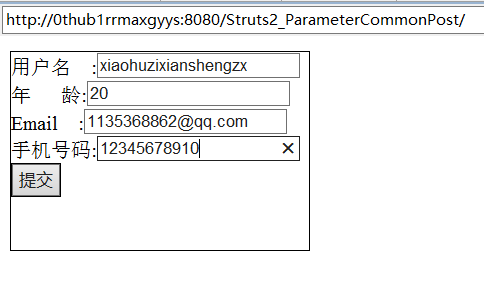
点击提交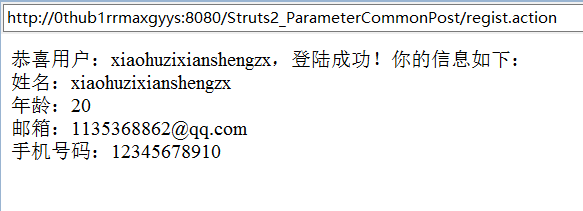
二、封装对象传递
由于上面那种方法比较麻烦,适用于参数较少的情况,为了避免这种情况,我们可以把这些参数单独封装在一个bean中,然后在action中调用。
1.基础还是不变,我们先新建一个UserBean类,可以在想同包下,最好分开,为了直观和以后做准备。
代码如下:1
2
3
4
5
6
7
8
9
10
11
12
13
14
15
16
17
18
19
20
21
22
23
24
25
26
27
28
29
30
31
32
33
34
35/**
* @author XiaoHuZiXianShengZx
* 封装参数传递
*/
public class UserBean {
private String name;
private int age;
private String email;
private String phone;
//添加get和set方法,用于参数传递
public String getName() {
return name;
}
public void setName(String name) {
this.name = name;
}
public int getAge() {
return age;
}
public void setAge(int age) {
this.age = age;
}
public String getEmail() {
return email;
}
public void setEmail(String email) {
this.email = email;
}
public String getPhone() {
return phone;
}
public void setPhone(String phone) {
this.phone = phone;
}
}
2.修改UserAction类1
2
3
4
5
6
7
8
9
10
11
12
13
14
15
16
17
18
19
20
21public class UserAction extends ActionSupport{
private UserBean user;//创建UserBean对象
//重写execute方法
public String execute(){
System.out.println("name="+user.getName());
System.out.println("age="+user.getAge());
System.out.println("email="+user.getEmail());
System.out.println("phone="+user.getPhone());
return "success";
}
//添加get和set方法
public UserBean getUser() {
return user;
}
public void setUser(UserBean user) {
this.user = user;
}
}
3.修改index.jsp1
2
3
4
5
6
7
8
9
10
11<body>
<div style="border: solid 1px black;width: 300px;height: 200px;margin: 0 auto">
<form action="regist.action" method="post">
用户名 :<input type="text" name="user.name" /><br/>
年 龄:<input type="text" name="user.age" /><br/>
Email :<input type="text" name="user.email" /><br/>
手机号码:<input type="text" name="user.phone" /><br/>
<input type="submit" value="提交"/>
</form>
</div>
</body>
4.修改ok.jsp1
2
3
4
5
6
7<body>
恭喜用户:<s:property value="user.name" />,登陆成功!你的信息如下:<br>
姓名:<s:property value="user.name" /> <br>
年龄:<s:property value="user.age" /> <br>
邮箱:<s:property value="uesr.email" /> <br>
手机号码:<s:property value="user.phone" /><br>
</body>
5.struts.xml与web.xml不变,运行结果与上面相同。
三、动态result
所谓动态result就是在利用action传回的不同值而动态的调用不同的方法。
这里举个简单的例子:
1.如图建立如下两个类,UserBean和上面相同,只需修改UserAction类(根据nextAction所赋予的值不同,得到不同的结果)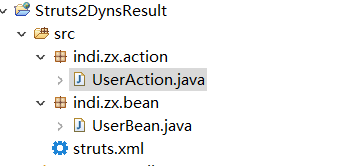
UserAction代码:1
2
3
4
5
6
7
8
9
10
11
12
13
14
15
16
17
18
19
20
21
22
23
24
25
26
27
28
29
30
31public class UserAction extends ActionSupport{
private String nextAction;
private UserBean user;//创建UserBean对象
//重写execute方法
public String execute(){
if(user.getName().equals("zx")){
nextAction="zx";
}else if(user.getName().equals("admin")){
nextAction="admin";
}else{
nextAction="ok";
}
return SUCCESS;
}
//添加get和set方法
public UserBean getUser() {
return user;
}
public void setUser(UserBean user) {
this.user = user;
}
public String getNextAction() {
return nextAction;
}
public void setNextAction(String nextAction) {
this.nextAction = nextAction;
}
}
2.配置struts.xml1
2
3
4
5
6
7
8
9
10
11
12
13
14
15
16<struts>
<package name="DR" extends="struts-default">
<action name="DynaResult" class="indi.zx.action.UserAction">
<result name="success" type="chain">${nextAction}</result>
</action>
<action name="zx">
<result>zx.jsp</result>
</action>
<action name="admin">
<result>admin.jsp</result>
</action>
<action name="ok">
<result>ok.jsp</result>
</action>
</package>
</struts>
3.在上面传值的基础上,我们新建2个jsp,zx.jsp和admin.jsp,里面的内容我是随便填的,只为了测试结果的正确与否。
zx1
2
3<body>
zx,调用成功 <br>
</body>
admin1
2
3<body>
admin,调用成功 <br>
</body>
4.结果显示:
启动程序,输入zx,其他任意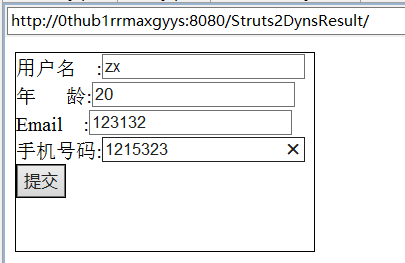
提交
输入admin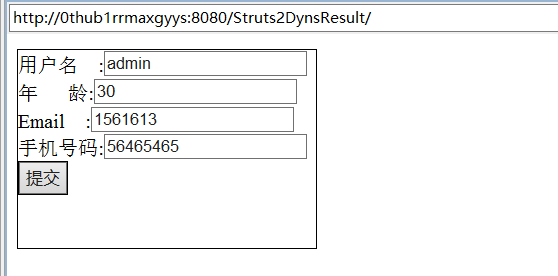
提交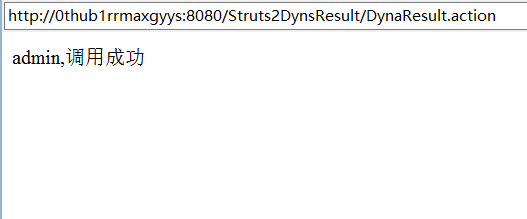
输入除了这两个的任意一个
点击提交
注:
- 如有不正确还请见谅。
- 另外,如需更多代码请访问我的Github:https://github.com/Zxnaruto


